Tuesday, 12 August 2014

Assignment;


original image:


Final Image;
Final wood print;
Editing process of the landscape image;
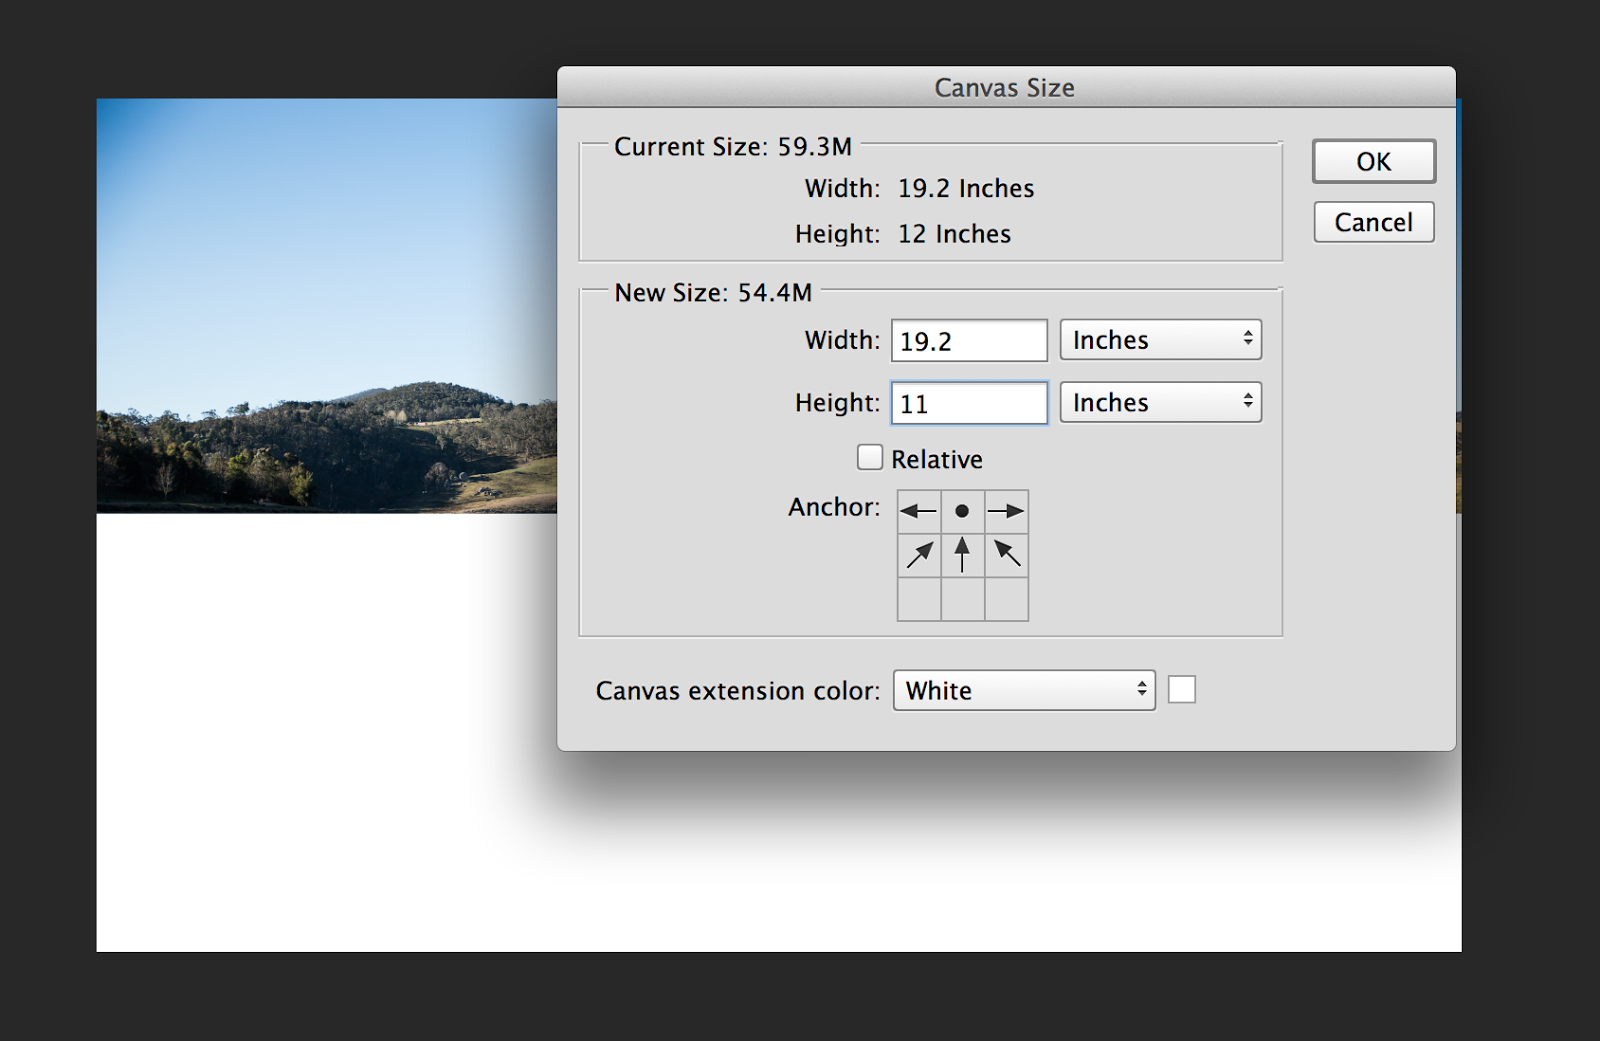
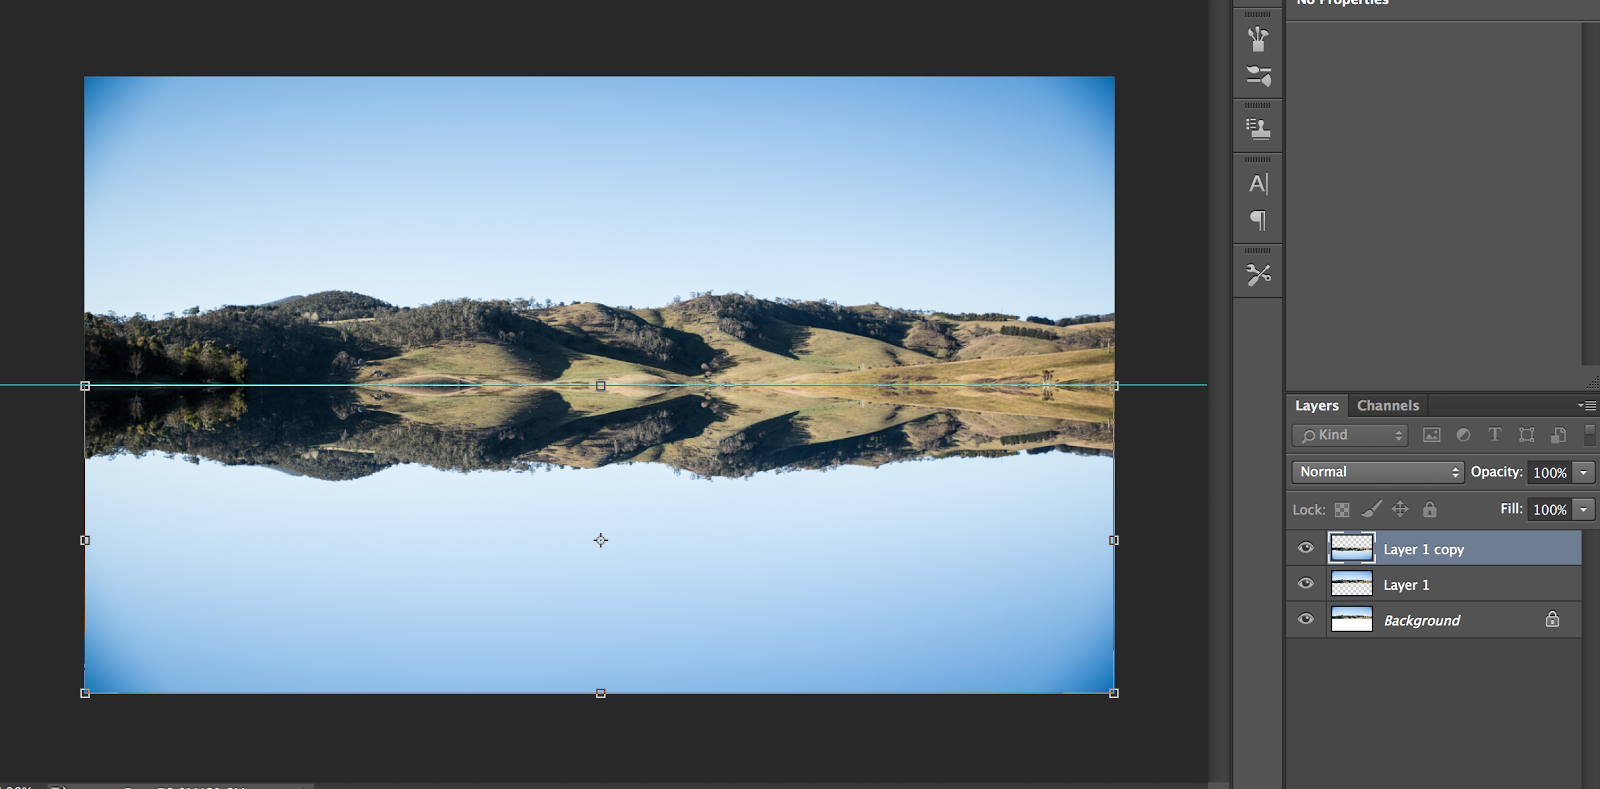
To start off. I created a white 'canvas' below the image. I then created a guide line making sure 'rulers' and 'snap' have been selected. Opening the 'rectangular tool' select the outline of your image and then copy the image and paste into a new layer. Make a second copy after this. Creating a mirror image; press 'Control+T' to open the transform tool. grabbing the top middle box, drag the image down into your canvas space. the image will automatically mirror.


Transform tool (Reversing image)


  • Make a copy of the reflection layer. Go to 'filter' 'blur' 'MotionBlur'. Make the angle 90 Degrees and the distance 35pixels. Now create a new layer and then press 'control' and 'delete' to colour the layer white. Go to filter 'noise' and the 'AddNoise'. Make the amount 400%, add gaussian and tick monochromatic. 
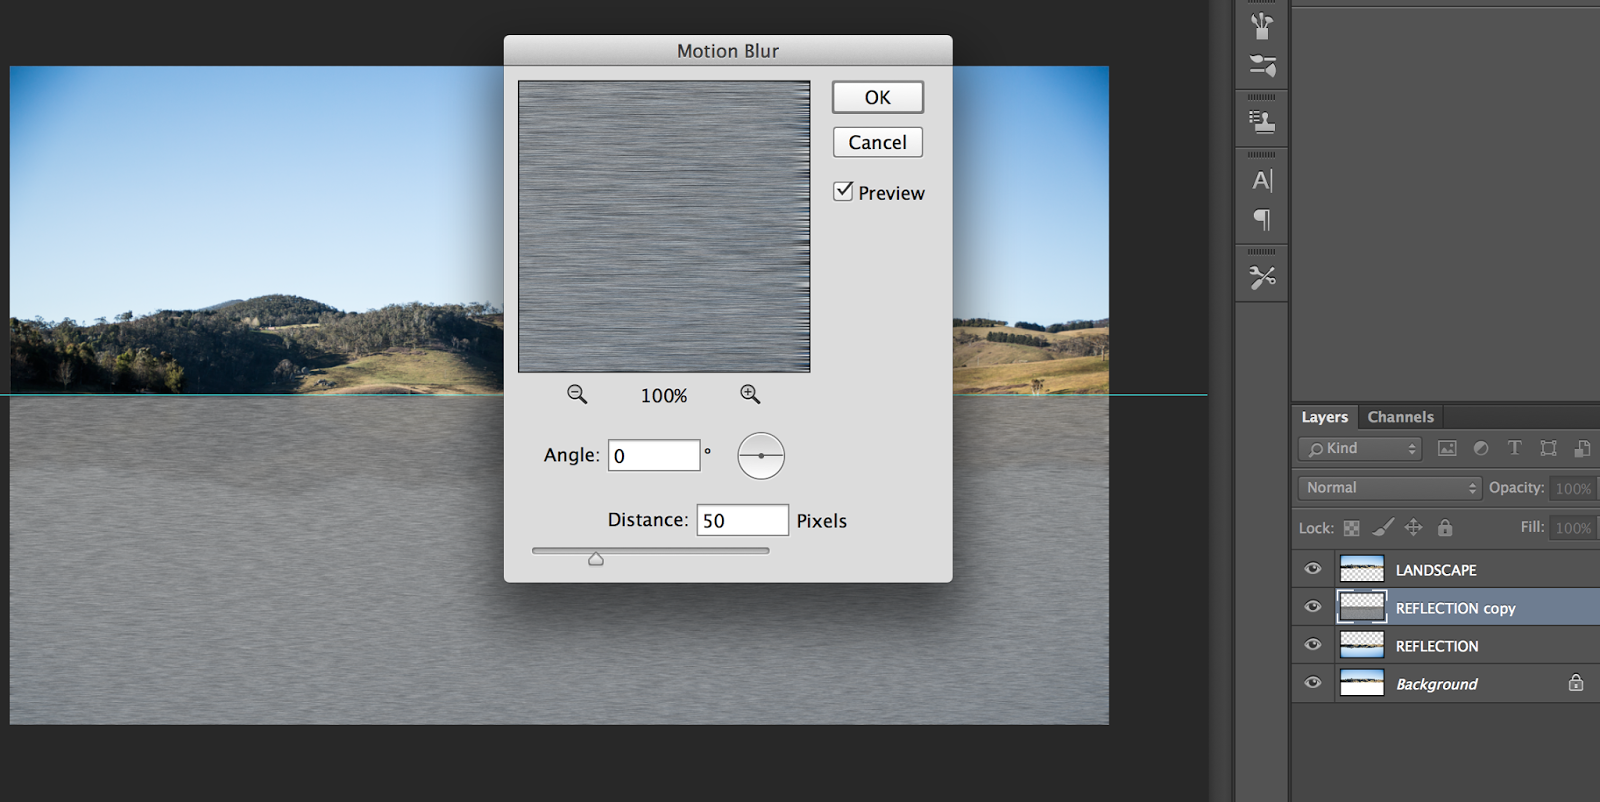
  • Go to Filter. 'Blur' then to 'MotionBlur'
  • Make the angle '0' and the distance '50Pixels'

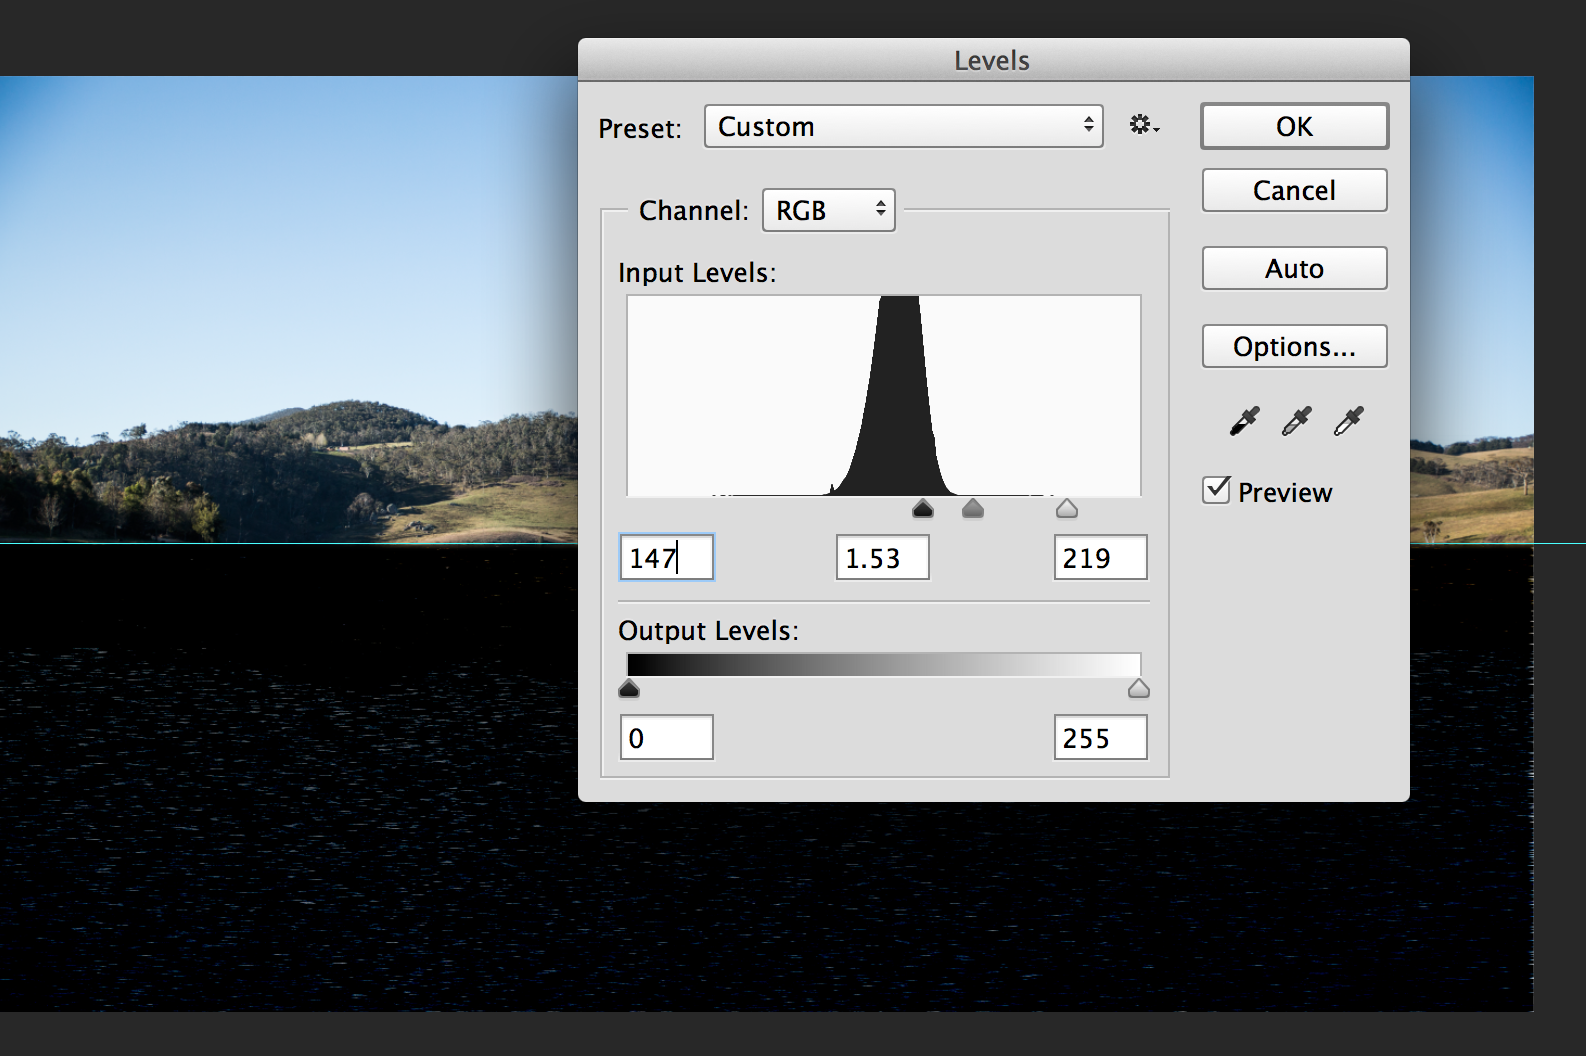
Change levels to adjust contrast of the ripplesWe then need to control the contrast of the image.
  • hold down 'Control' + 'L'
  • Change the output levels to '147. The Midtones '1.53' and the output levels '219'
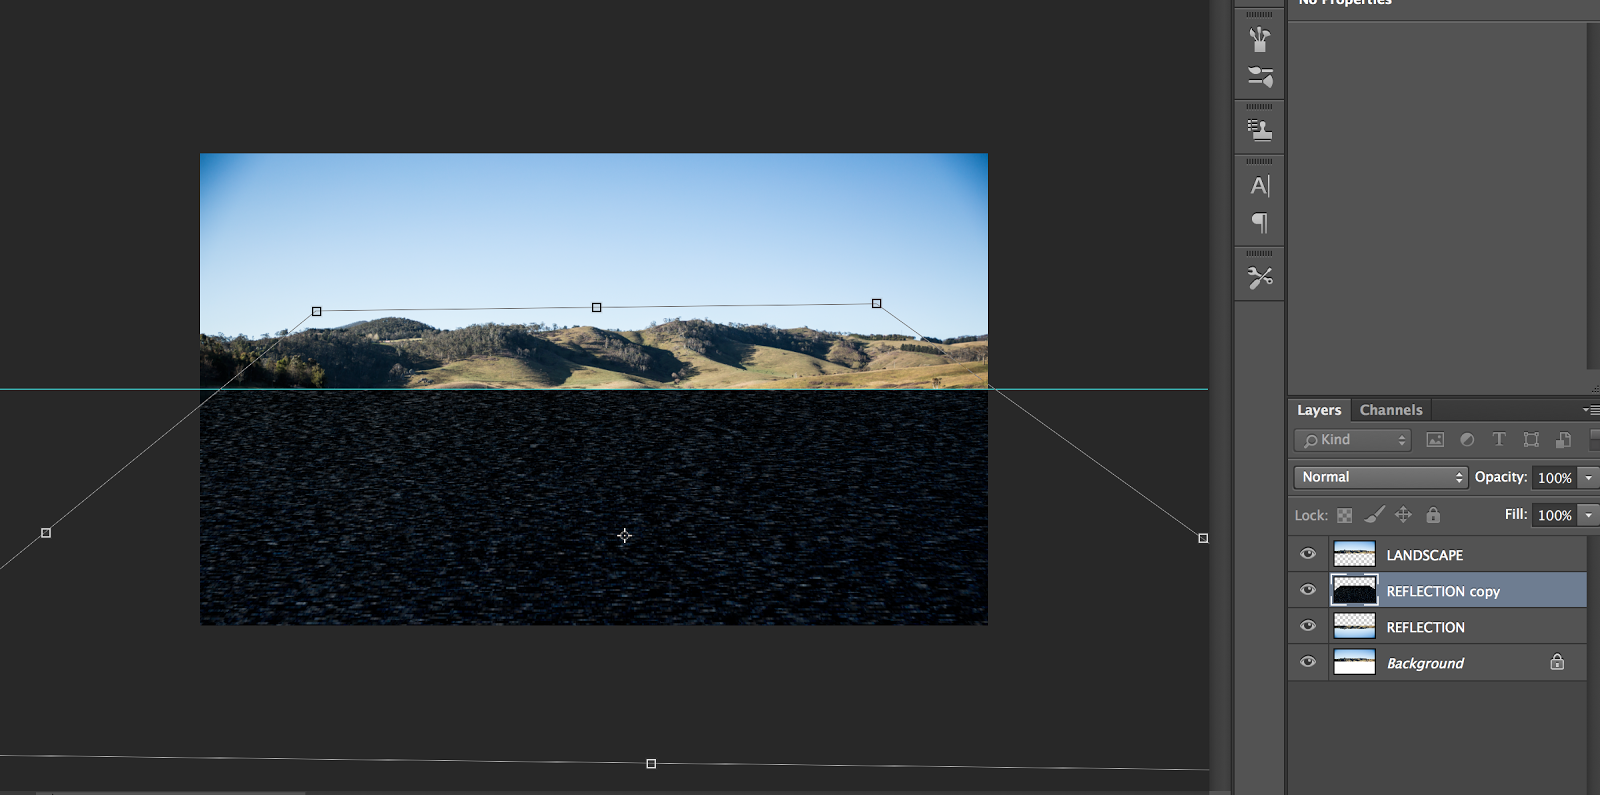
I wanted to make the ripples of the water longer towards the bottom of the image and smaller and condensed towards the top of the image. to do this;
  • Open the transform tool by pressing 'control' and 'T'
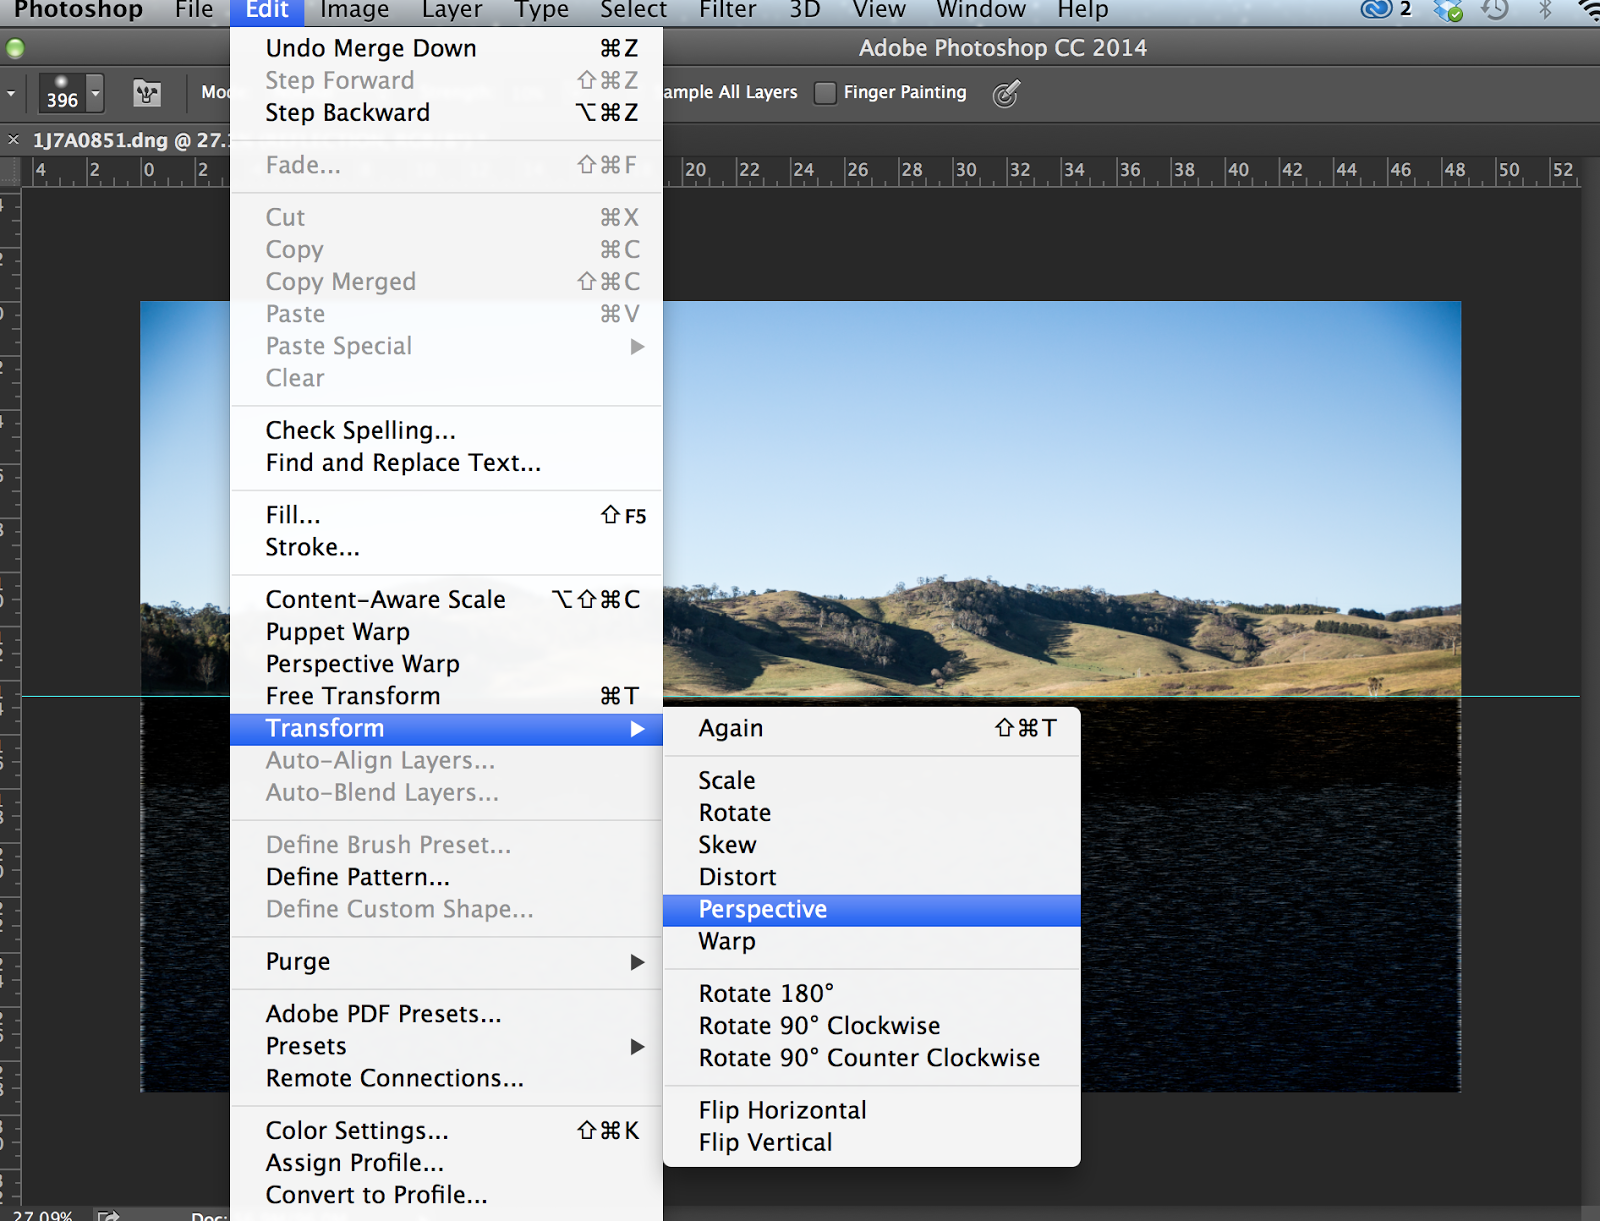
  • Go to 'Edit' 'Transform' and 'Perspective'
  • Go to the bottom corner and drag outwards. You will see the lines getting wider towards the bottom.
  • Then drag the top corners inwards. The image above demonstrates.
Changing the size and length of the waves


Using the smudge tool to smudge waves


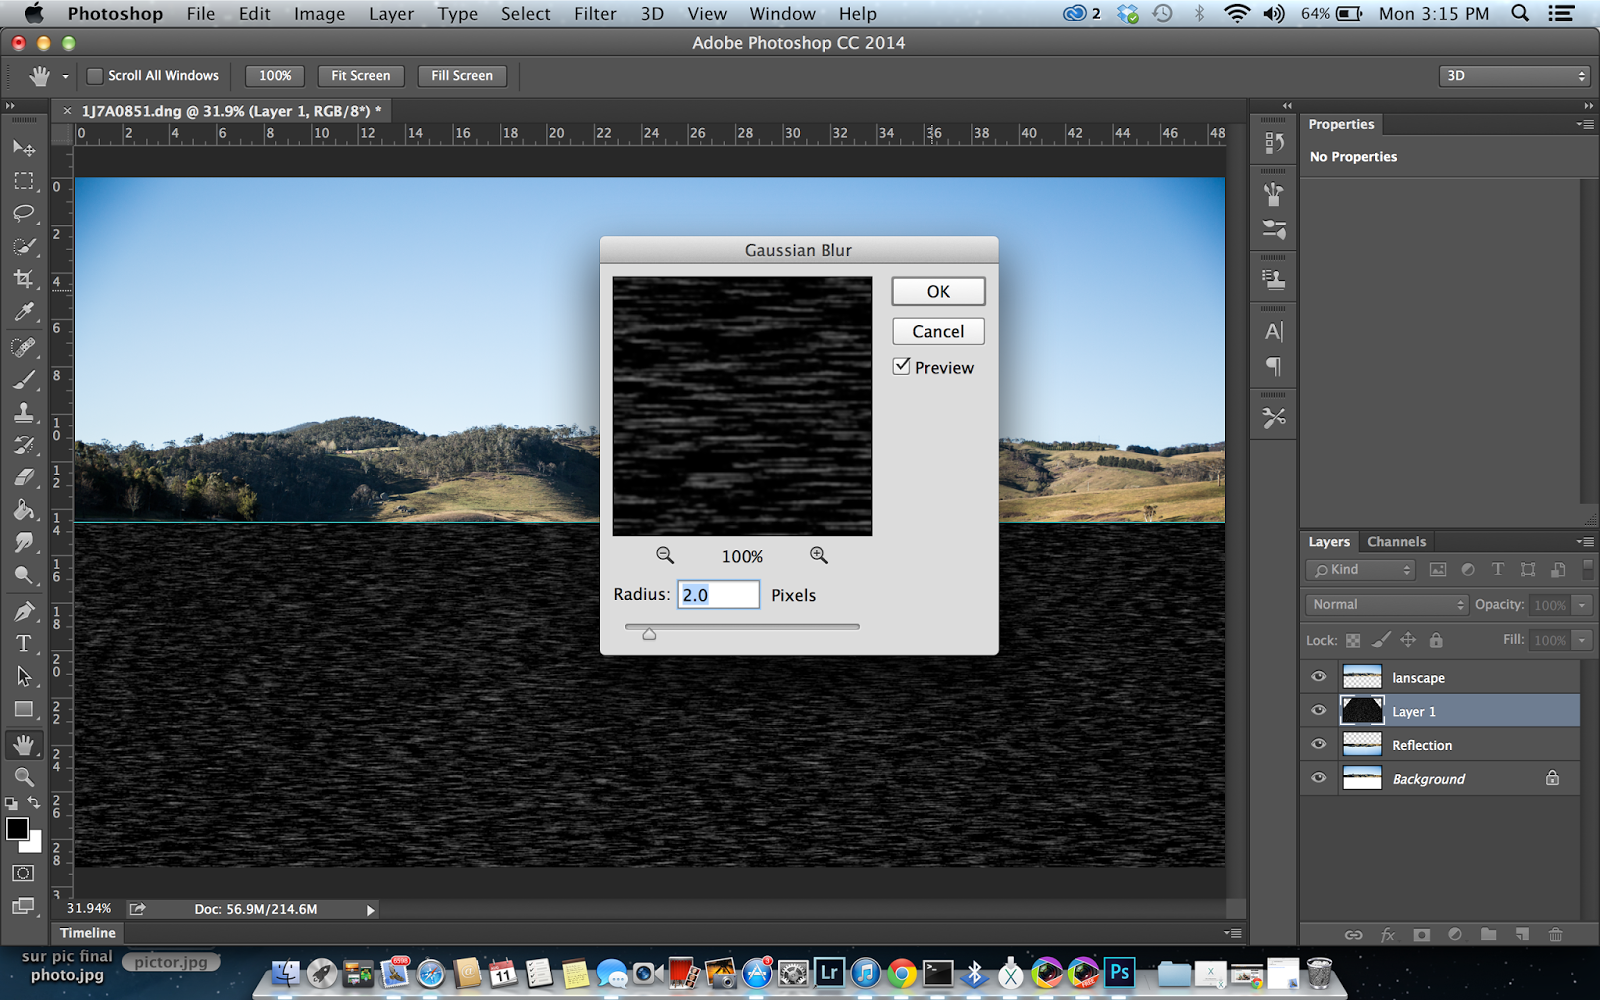
Radius of 2 pixels
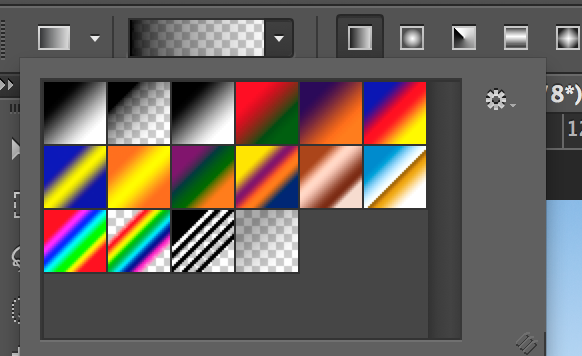
Adding a gradient to the bottom of the image


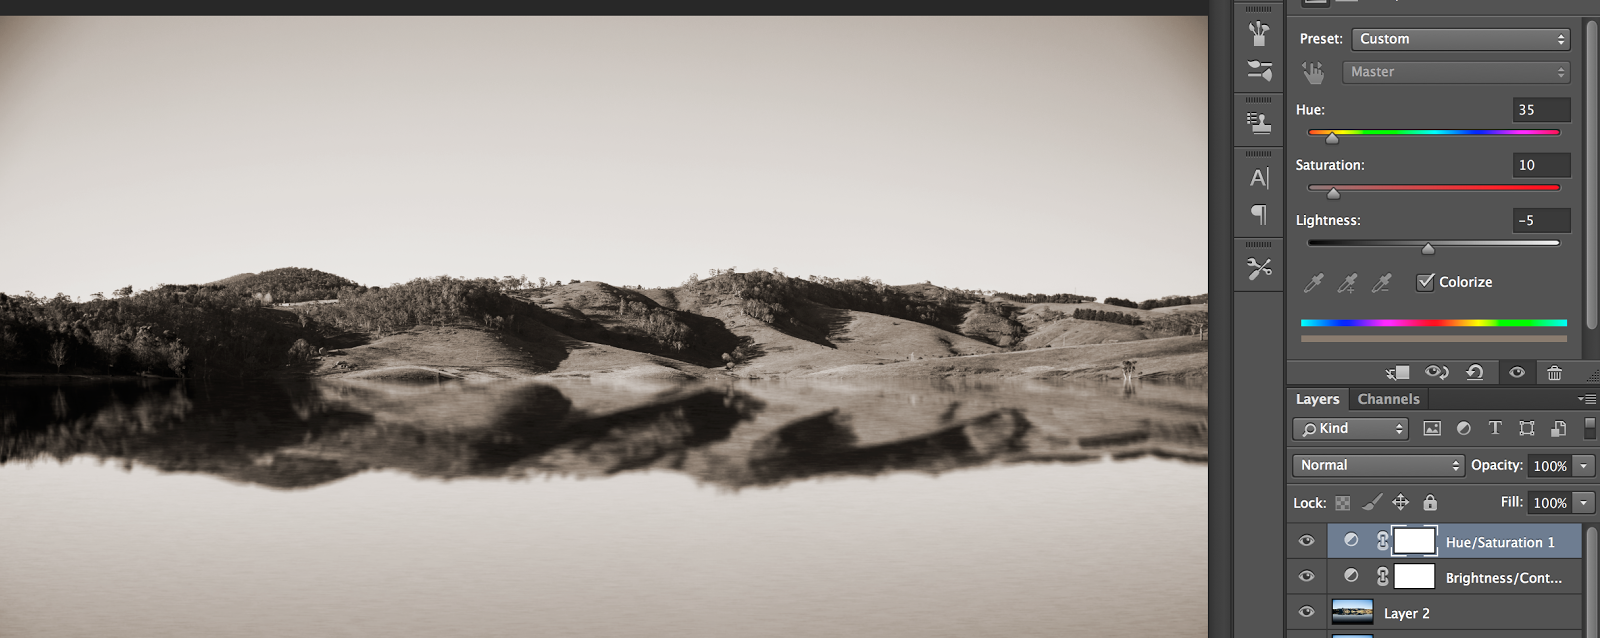
I then changed the colour of the image to 'Old colour'


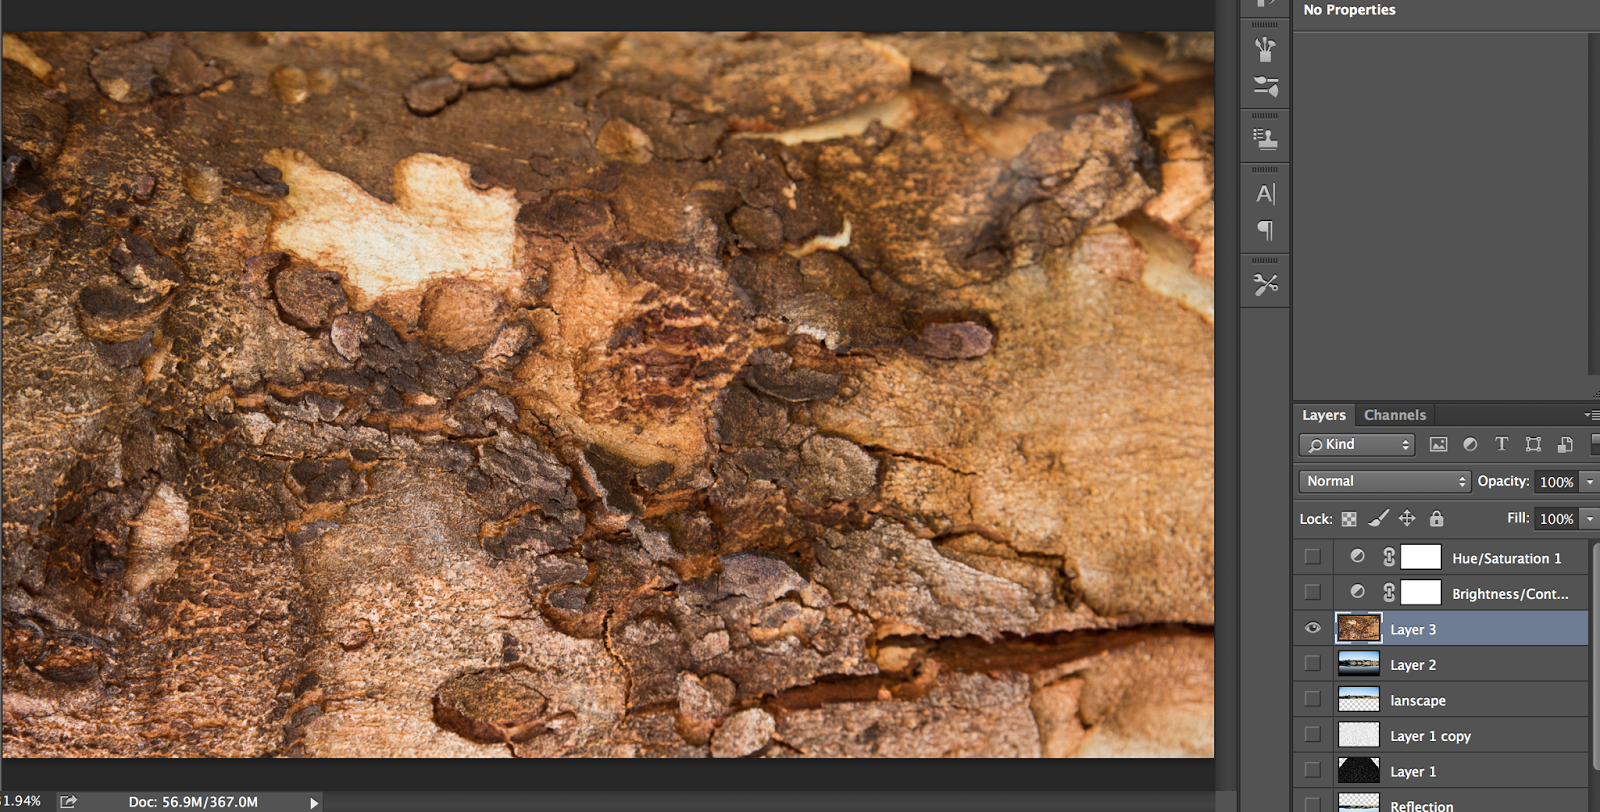
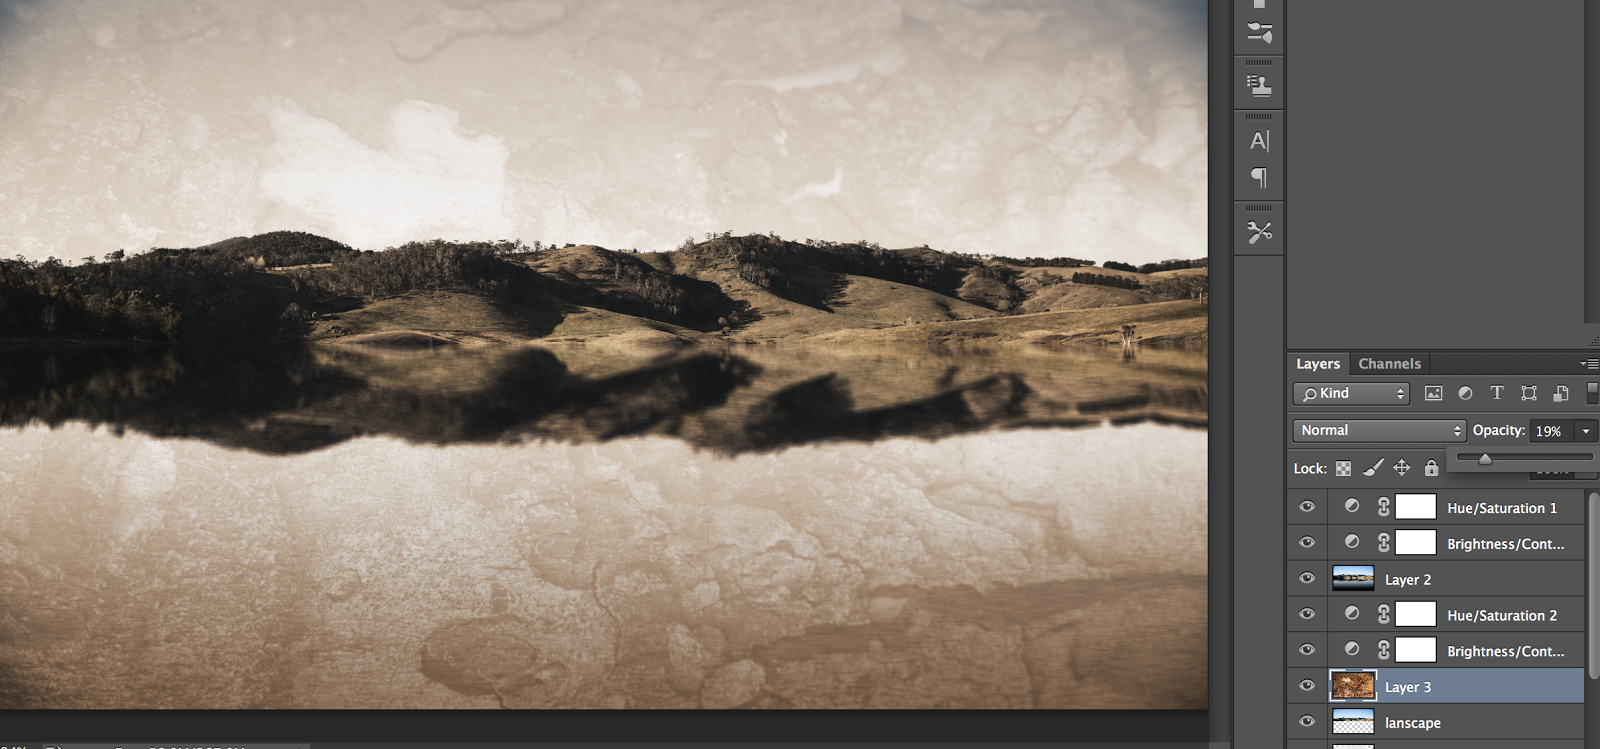
Adding a textured image i took of a tree in my garden. Blending with the final landscape image. 


Opacity of 64%


Other Images i practiced with;


The process;


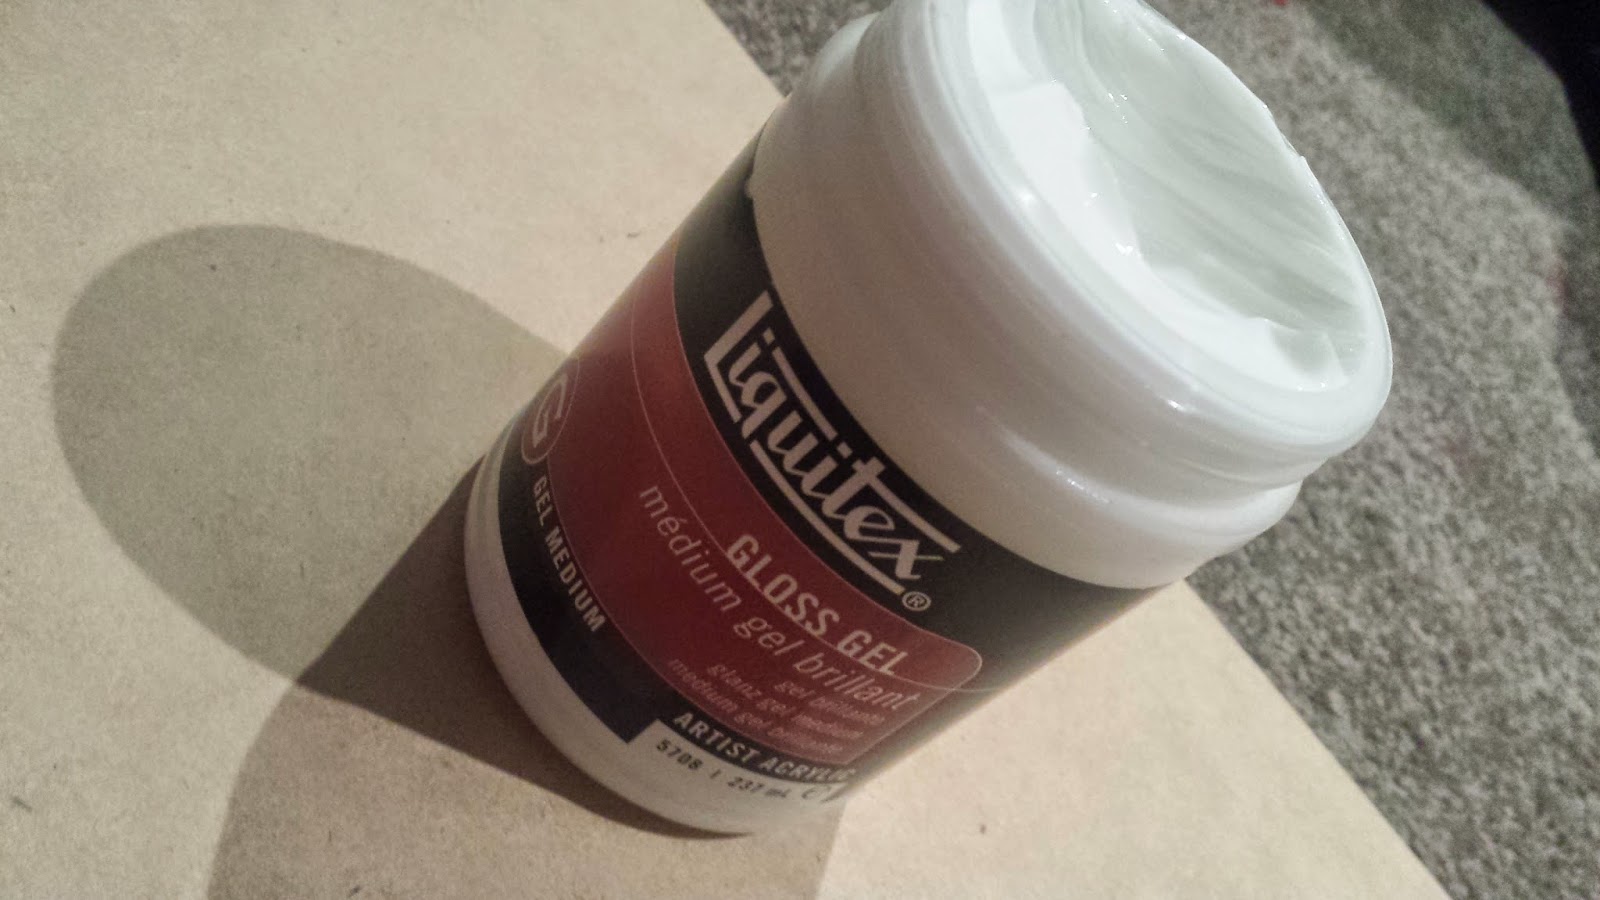
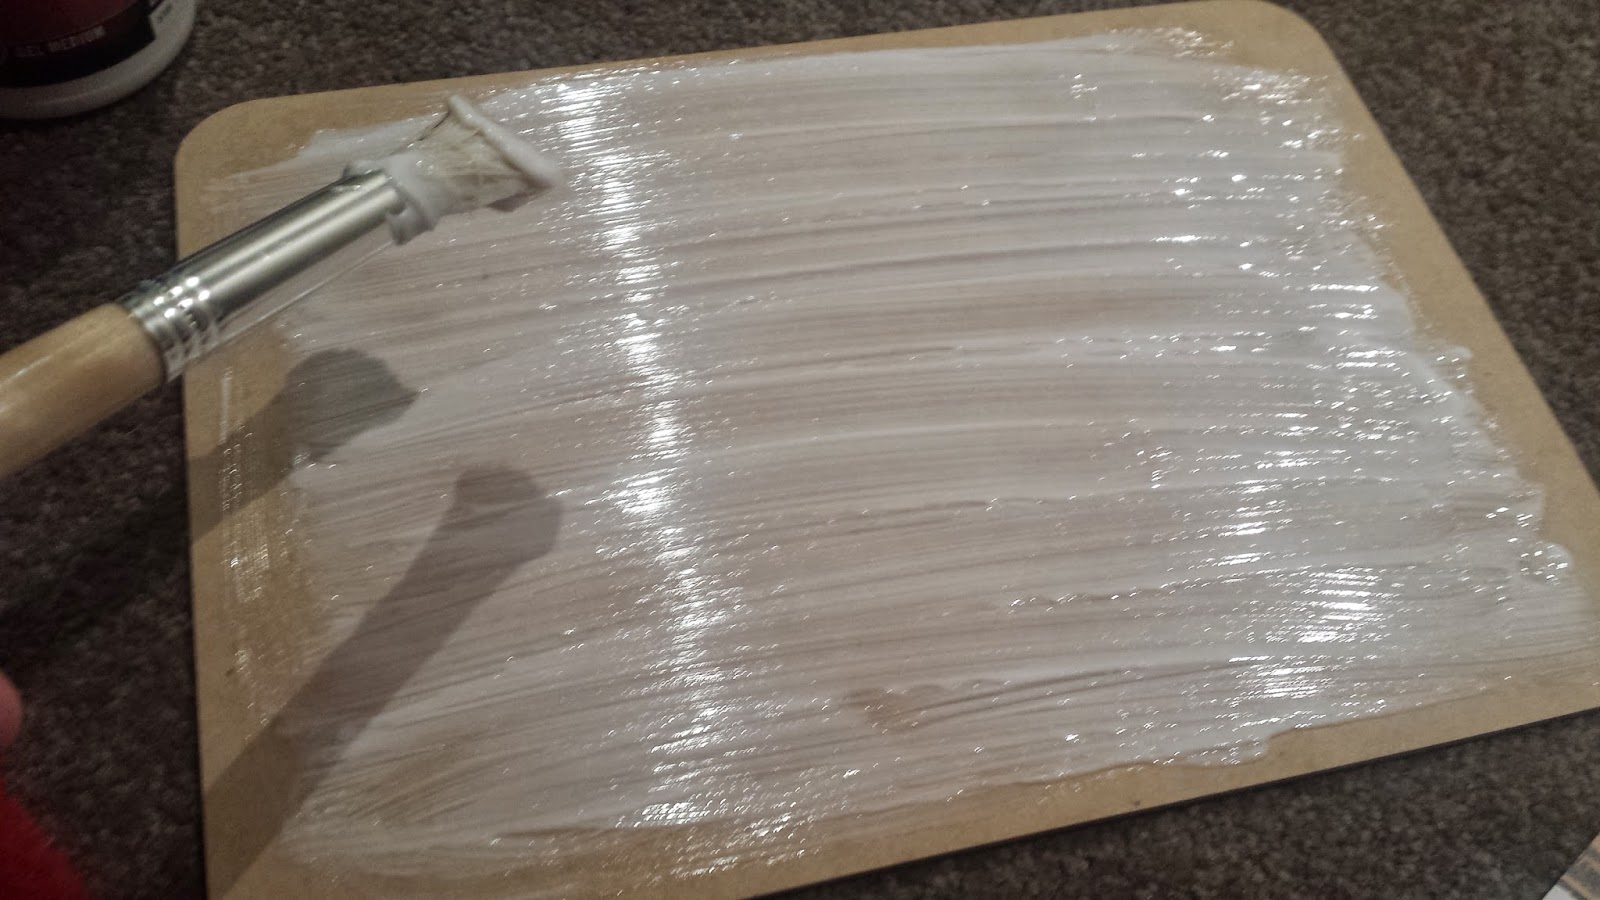
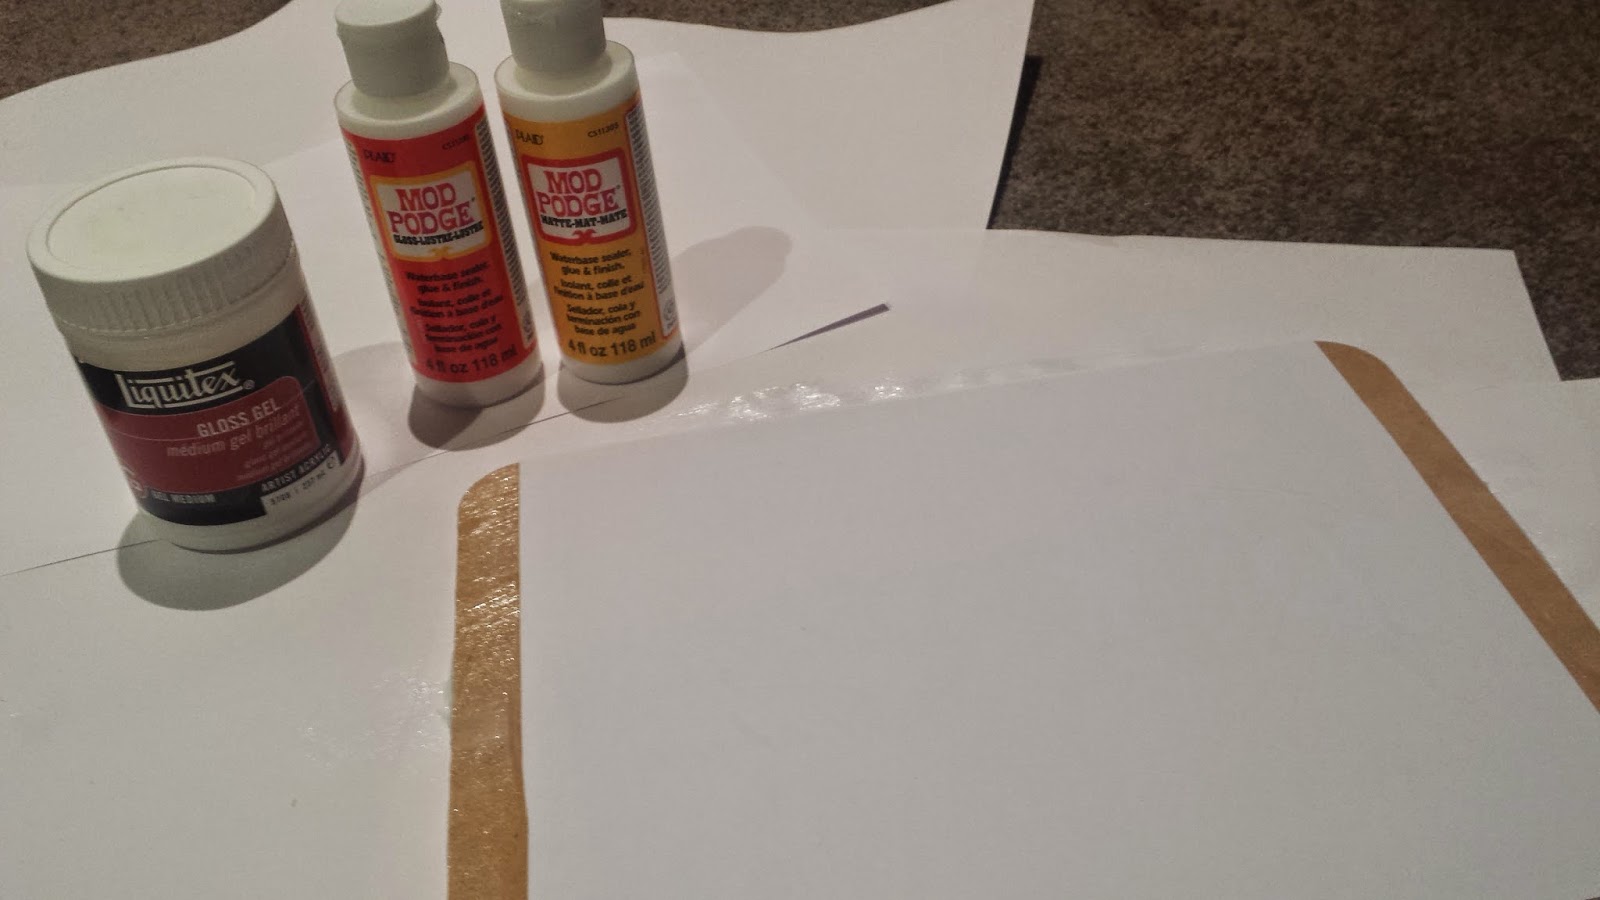
Medium Gloss Gel (Spot light)

Added a decent layer over the wood. Also Purchased from Spot Light


Using a 'Laser Print' photo of my landscape image (Printed at office works because my printer died on me). lay the image face down onto the medium gloss gel.
  • leave the image to dry over night.

Final outcome;
  • Once the image is dry. I added the finishing 'matte' gel
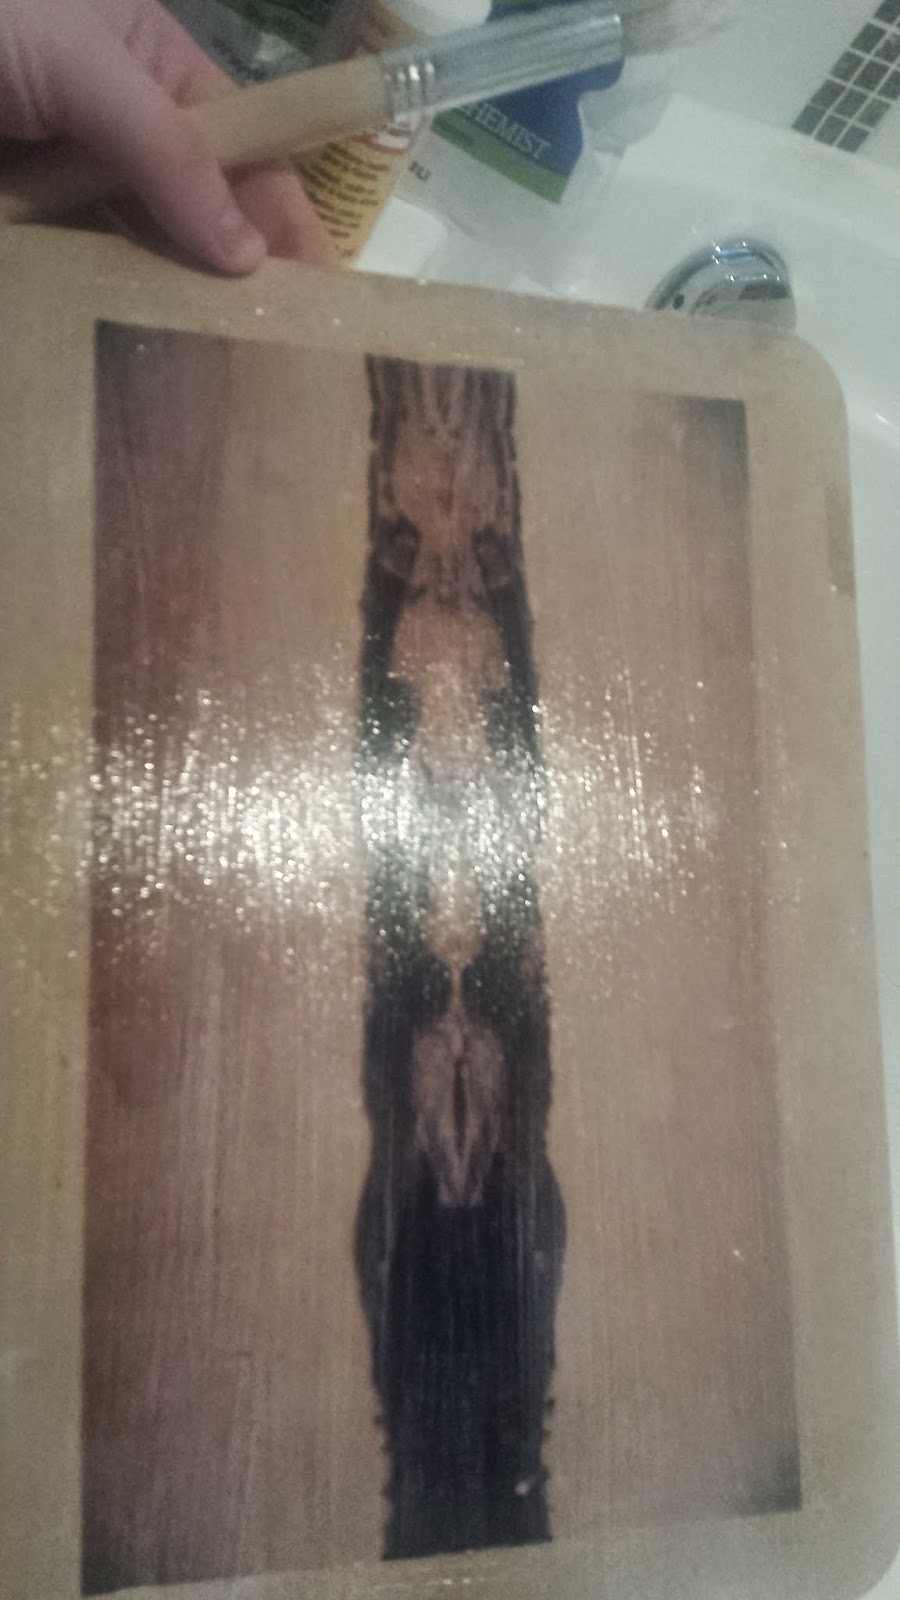
I left the wood under running water for about 1minute.
  • Carefully! rub paper off the wood. I used a cloth with a mesh on the inside, using circular motions and water.

mistakes;
  • Result to rubbing too hard;


The overall costs from Spotlight were:
○ $5.99 - wood planks x4
○ $16.95- Medium Gel
○ $15 - modge podge matte + gloss gel

Experimenting with Medium Gloss Gel;

Wood Transfers;
Medium Gloss gel (Purchased at Spot light)
All of the products i have been using including the top layer coats (Matte/gloss) For that final look
Adding a layer of the medium gloss gel to the wood i will be transferring the image to. Place the image face down onto the gel.


(Other shapes i have been experimenting on)


Smoothing down the paper making sure there are no air bubbles


Leave to dry over night

Final image

Add matte or gloss finish to give that textured look

Sunday, 10 August 2014

Experimenting for the assignment;


After researching different ways of reflecting an image. I experimented using photoshop to create a water reflection of a landscape image.

The original Image
The outcome

The process;
To start off. I created a white 'canvas' below the image. I then created a guide line making sure 'rulers' and 'snap' have been selected. Opening the 'rectangular tool' select the outline of your image and then copy the image and paste into a new layer. Make a second copy after this. Creating a mirror image; press 'Control+T' to open the transform tool. grabbing the top middle box, drag the image down into your canvas space. the image will automatically mirror.

After you have mirrored the image. Drag the copy layer below layer one. Name it reflection. Then name the top layer opera house (Or what ever the photo associates with)
  • Make a copy of the reflection layer. Go to 'filter' 'blur' 'MotionBlur'. Make the angle 90 Degrees and the distance 35pixels. Now create a new layer and then press 'control' and 'delete' to colour the layer white. Go to filter 'noise' and the 'AddNoise'. Make the amount 400%, add gaussian and tick monochromatic. 
  • Go to Filter. 'Blur' then to 'MotionBlur'
  • Make the angle '0' and the distance '50Pixels'
We then need to control the contrast of the image.
  • hold down 'Control' + 'L'
  • Change the output levels to '147. The Midtones '1.53' and the output levels '219'
I wanted to make the ripples of the water longer towards the bottom of the image and smaller and condensed towards the top of the image. to do this;
  • Open the transform tool by pressing 'control' and 'T'
  • Go to 'Edit' 'Transform' and 'Perspective'
  • Go to the bottom corner and drag outwards. You will see the lines getting wider towards the bottom.
  • Then drag the top corners inwards. The image above demonstrates.

      • Then go to 'Filter' 'Blur' and 'Gaussian Blur' . Blur it at 2.0 pixels
      • Make a copy of it (As shown in the image above)
      • The first copy will be the shadows of the ripples in the water. Switch it off active (hide eyeball) and then click the original layer to make that active.
      • I then changed the blend mode to 'Soft light'
      • And the opacity to 40%
      • Image below shows the process
  • Make the second layer active, and click the eye to activate the layer
  • Convert the image by pressing 'Convert' and 'I'
  • Make the blend mode 'Overlay'
  • And the opacity 30%
'Overlay'
  • Click onto the move tool and then use the arrows on your keyboard to point the direction of where you want the shadows to go. In my case i pressed 'down'
Optional; Use the 'BlurTool' to blur the water

Last step; create a gradient.
  • 'Command' 'Shift' 'Option' + 'E' to put all layers together into one image
Using the gradient tool. select which gradient you would prefer and then drag from the bottom of the image (Or location you wish) and let go to create the gradient.


Tuesday, 5 August 2014

Photographic Techniques; Collages and Montages


panorama is any wide-angle view or representation of a physical space, whether in paintingdrawingphotographyfilmseismic images or a three-dimensional model. The word was originally coined in the 18th century by the Irish painter Robert Barker to describe his panoramic paintings of Edinburgh and London. The motion-picture term panning is derived from panorama.
A panoramic view is also proposed for multi-media, cross-scale applications to outline overview (from a distance) along and across repositories. This so-called "cognitive panorama" is a panoramic view over, and a combination of, cognitive spaces. Used to give a small shot of a wide area.

Using photoshop at Tafe i merged several images to create a panoramic image of the city.

The outcome: 


  • Opening photoshop. Click 'File' then 'Automate' Then 'Merge'
  • Select the images you wish to merge together (series of photos of the area you wish to capture and surrounding areas'
  • Select ok and photoshop will merge automatically.
After learning this process at tafe i went home and merged some more images together:

The outcome:


Open photoshop. Select 'File' 'Automate' 'Merge'

Select the images you wish to merge together
Select these options before merging


Monday, 4 August 2014

Photographic Techniques;

The digital pinhole affect. An affect created to enhance a digital image, depending on the size of the hole, sharpness of the whole all depending on what aperture it will represent.


A great example of the pinhole affect by Steve Irvine using his Nikon F2 camera :


An example of which i have experimented with my camera:
Using an old camera cap i pierced a hole and took photos through this cap without a lens

Examples of flowers i took via a pin hole

Artistic blury shot of the same flowers

Shiny metal objects through my pin hole camera